Launching a quest involves defining its identity, adding tasks for your community to complete, and setting up rewards. This guide walks you through the entire process.
Step 1 - Create a new quest
Navigate to the Quests section in your community dashboard and click the Create new quest button. You’ll be asked to choose whether you want to create a quest from scratch or by using of the available templates. Select Create quest from scratch for now. This will take you to our quest creation wizard: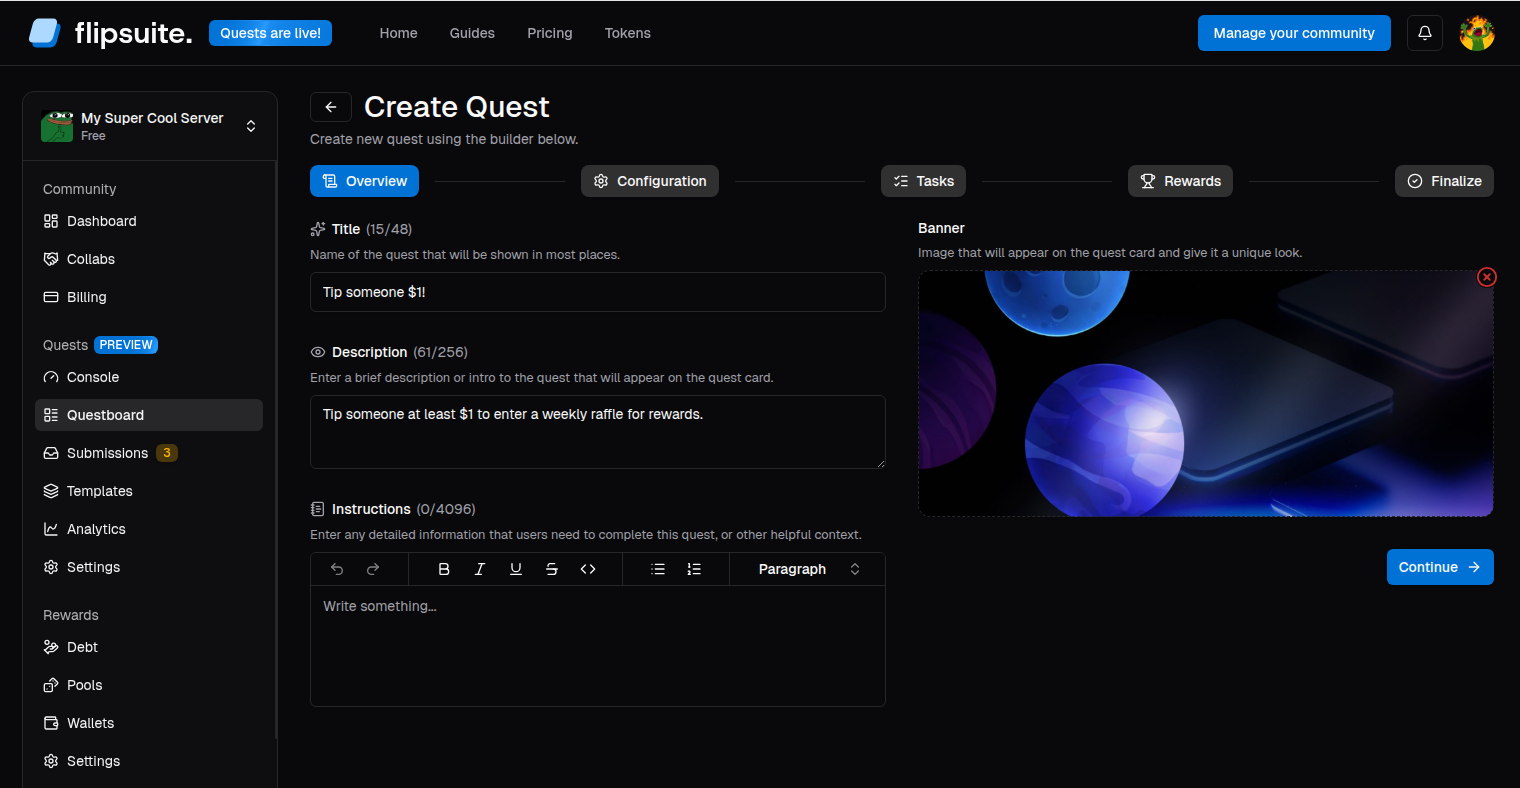
- Name: The title of your quest as it will appear to users.
- Description: A brief quest description that will be visible on your quest card.
- Instructions: Detailed instructions or context required to finish a quest.
- Banner: Upload a high-quality image to represent your quest.
Step 2 - Configure quest
Decide how often users can complete this quest and if there’s a cap on total completions.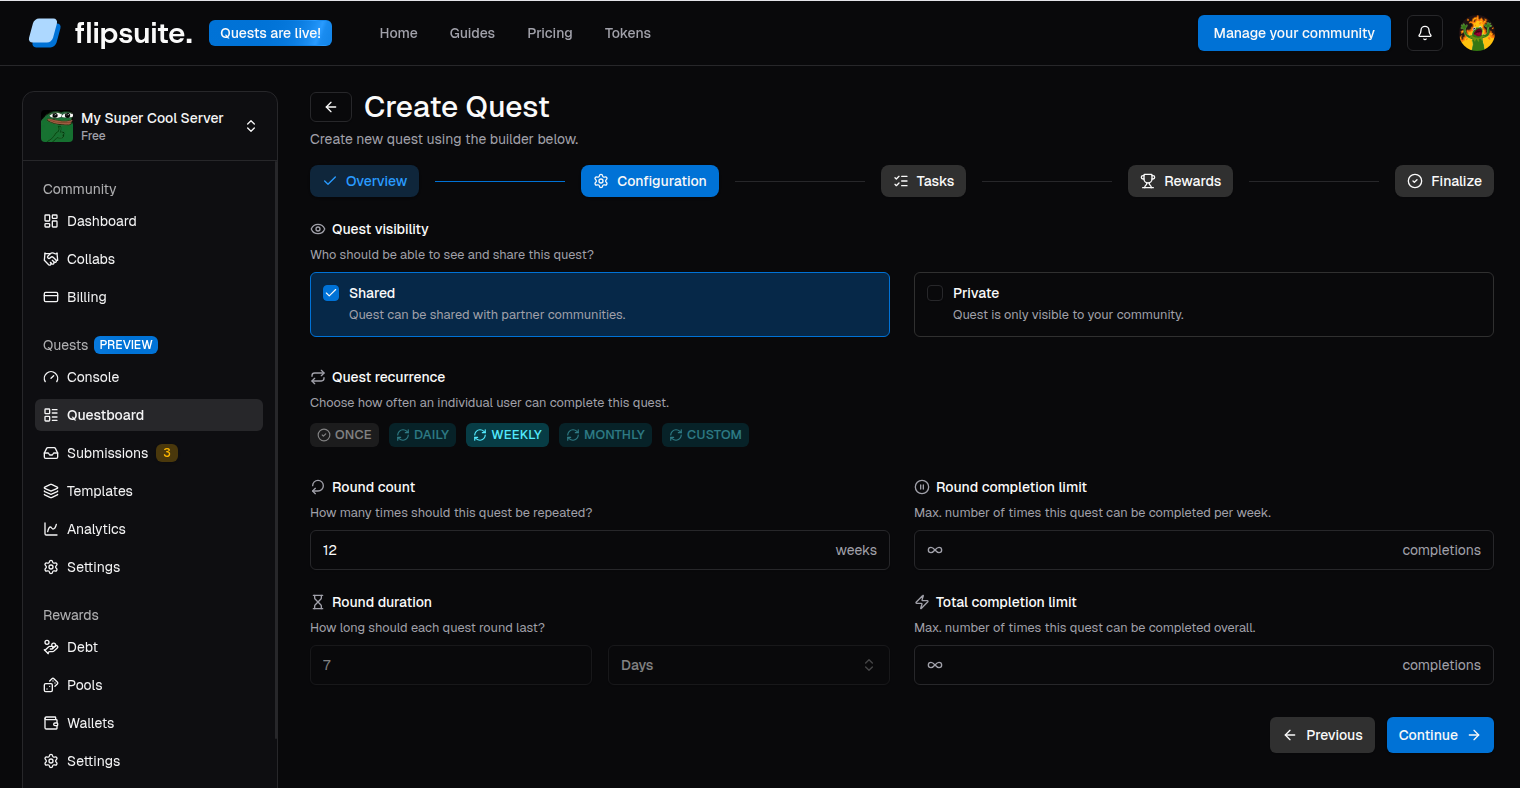
- Visibility: Choose if the quest should be visible to communities you collaborate with.
- Recurrence: Choose between
ONCE,DAILY,WEEKLY,MONTHLY, orCUSTOMintervals. - Round count: For recurring quests, how many times the quest itself can repeat.
- Max total completions: Global cap for all users.
- Max round completions: Cap per user per interval.
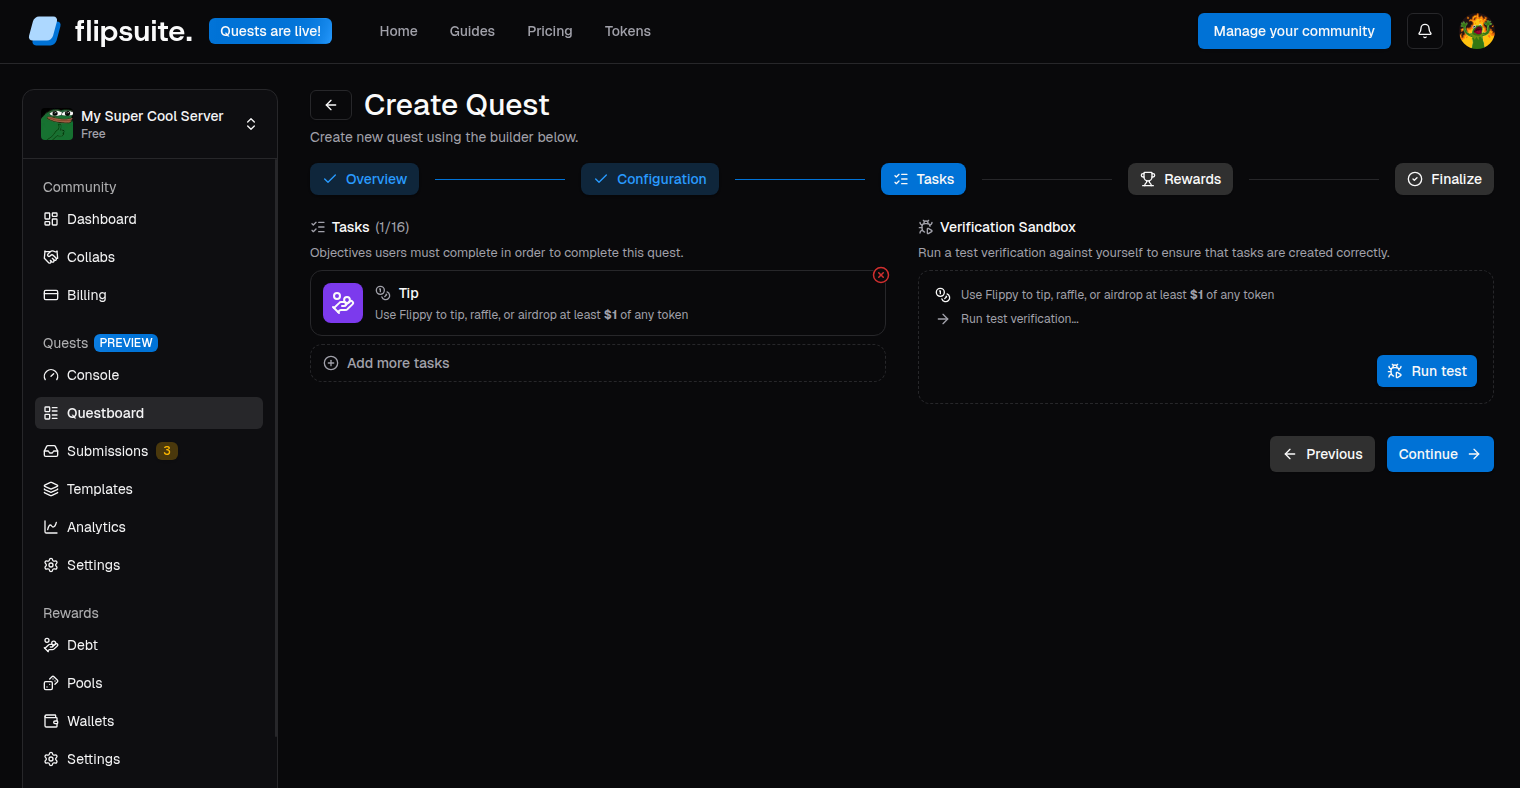
Step 3 - Add tasks
Tasks are the requirements users must meet or specific actions they need to take. We already support over 20 different task types. Click Add task to browse the task library.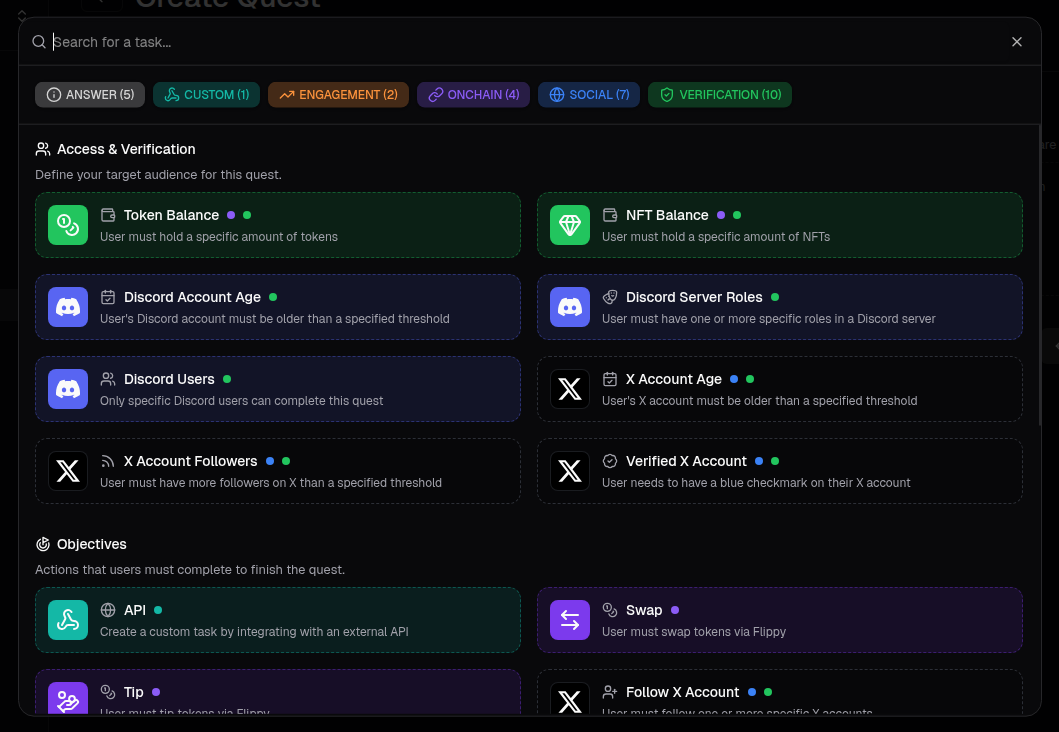
Task reviews
Each task you add to your quest can be toggled to require a review from your team member before it can be completed. This is useful if a task cannot be fully verified by our system (like reviewing if a meme uploaded by a user is on-topic).Reward boosts
Each optional task you add to your quest can be granted a reward boost that will increase the final reward for anyone who meets the task’s requirements. It’s a great way to gamify quests in your community and reward community members who are willing to put in more effort.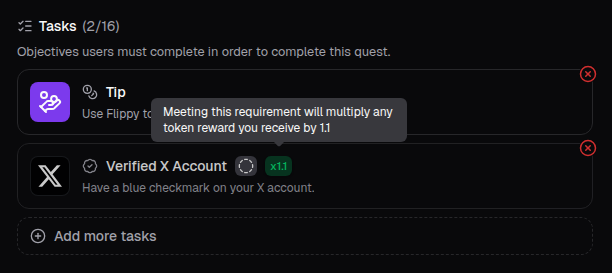
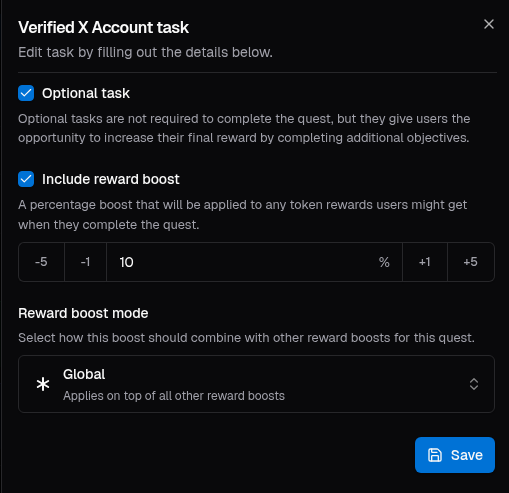
- Max: Only the highest boost from all
MAXreward boosts is applied - Cumulative: All boosts with
CUMULATIVEmode will be added together - Global: Applies on top of all other reward boosts
Step 4 - Set up rewards
Choose how you want to reward your community. Click Add reward to browse the available reward types.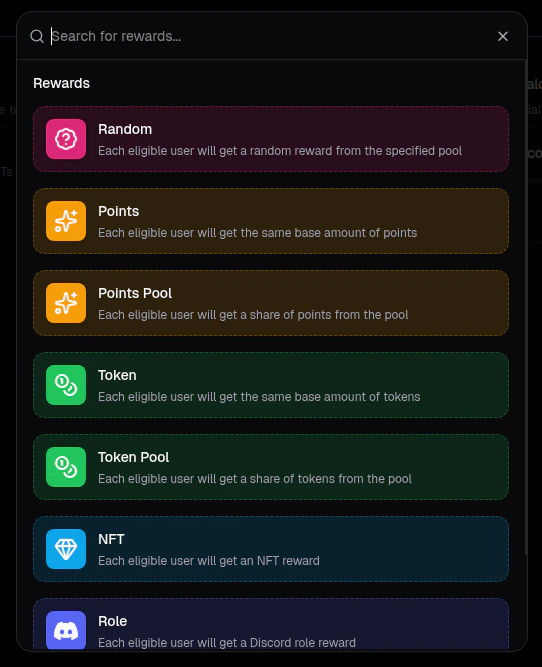
- Random: Each user will get a random reward from a selected reward pool.
- Points: Each user will receive a specific, base amount of points.
- Points Pool: All users will share a pool of points.
- Token: Each user will receive a specific, base amount of tokens.
- Token Pool: All users will share a pool of tokens.
- NFT: Users will receive a specific NFT.
- Role: Users will be granted a specific role in your Discord server.
- Custom: Users will get a custom reward that’s defined by you.
- Everyone: All users who complete the quest will receive the reward.
- FCFS: Only the first
Nusers who complete the quest will receive the reward. - Raffle: Only
Nrandom users will receive the reward once the quest ends.

Rewards
Click to learn how to set up rewards in Flipsuite.
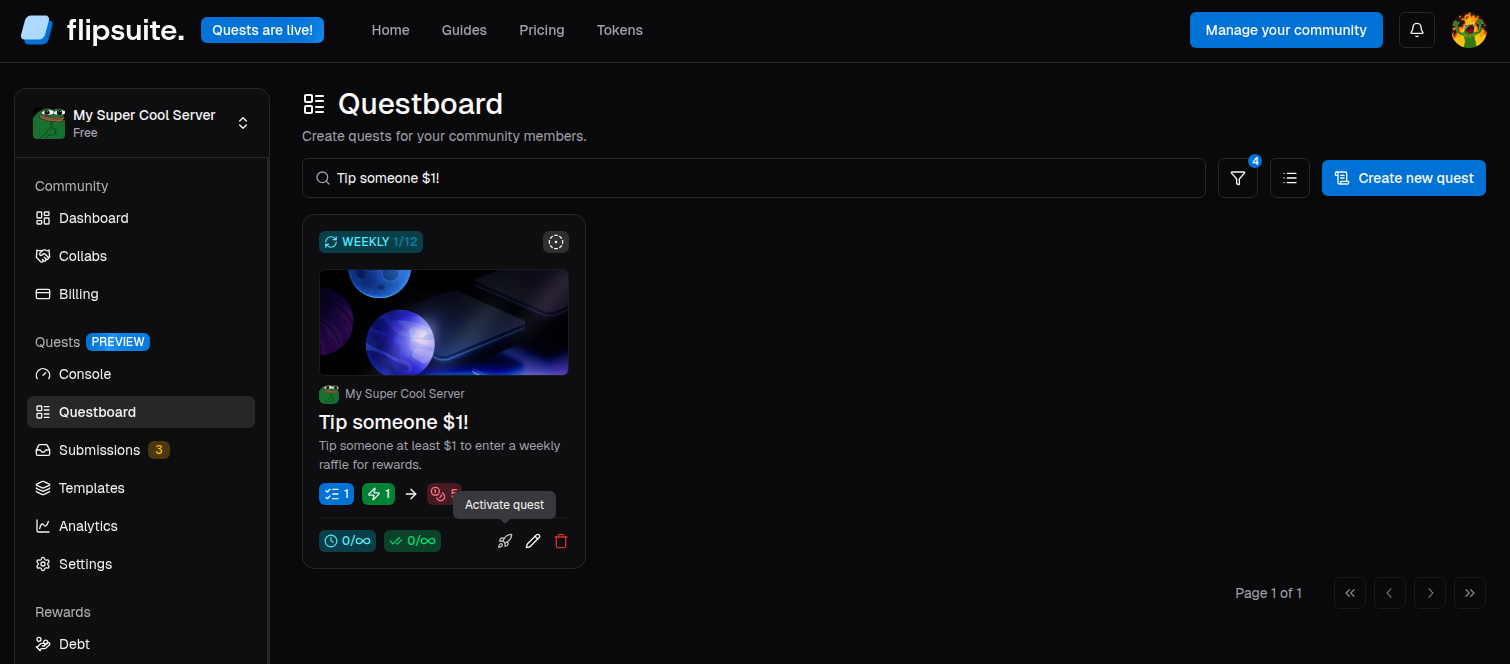
Step 5 - Review and activate
Once the quest is configured, it’s time to review and finalize it.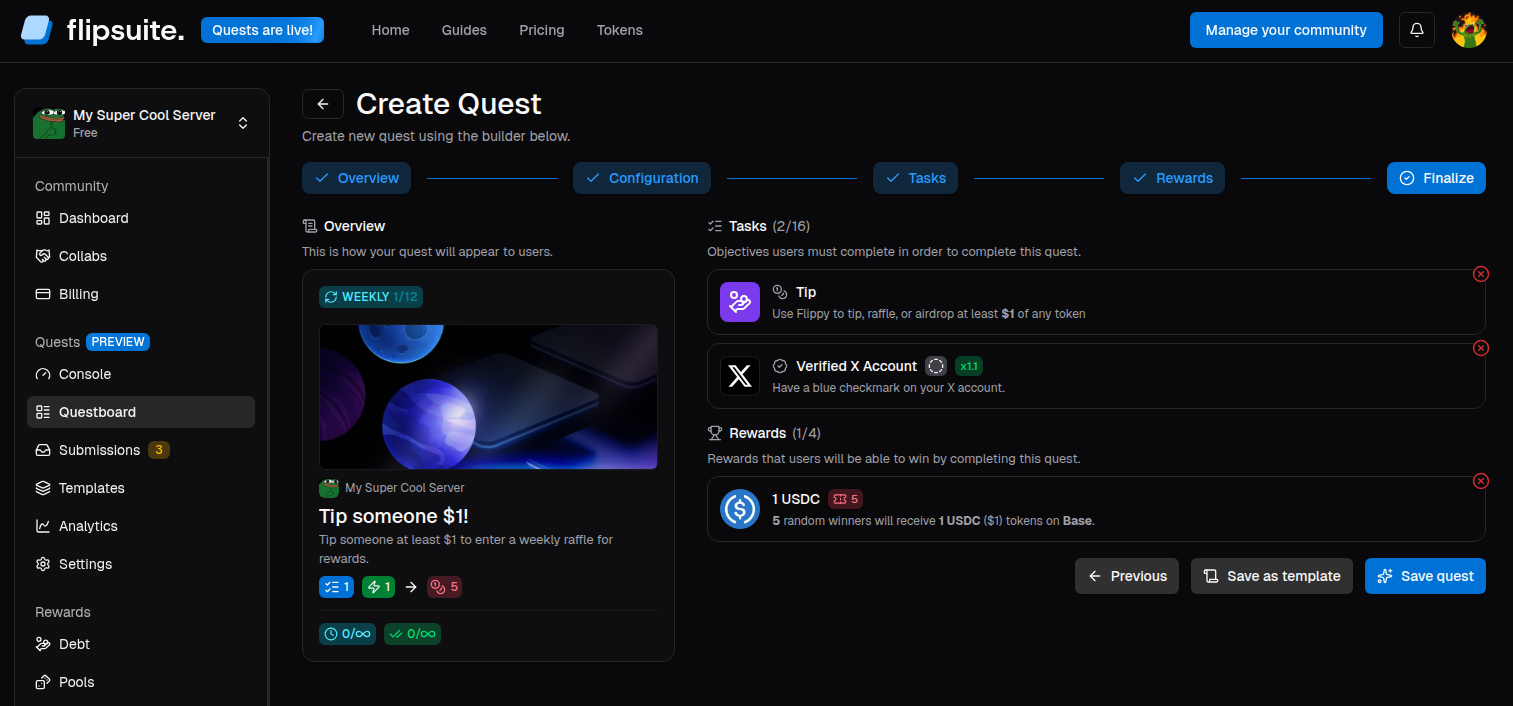
DRAFT
state and won’t be visible to users yet. To activate your quest, simply find it in your questboard and click
the Activate quest button.
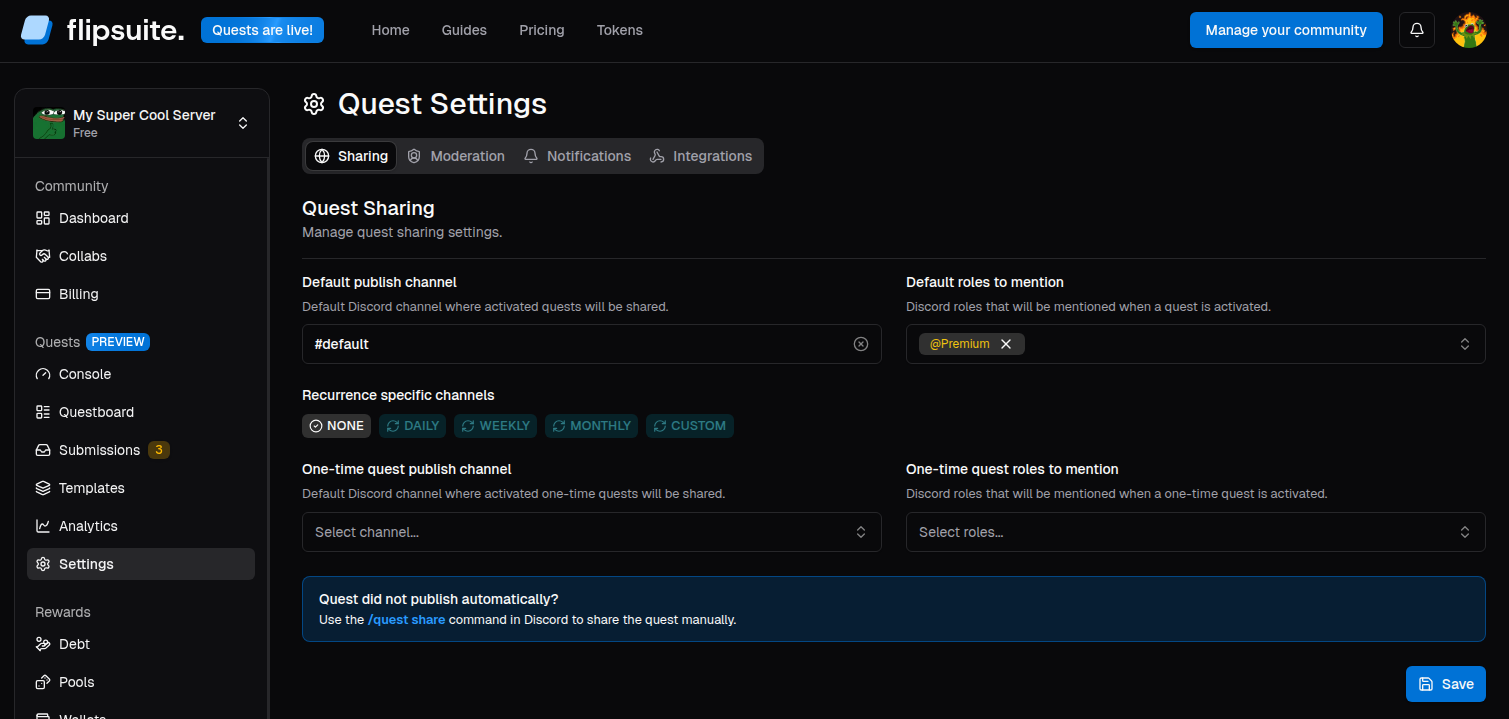
Sharing your quest
By default, you need to use/quest share slash command in Discord in order to share your quest. If you want to
automate this process and push quests to respective Discord channels automatically, head over to the
quest settings and configure channels for automatic sharing.