Step 1 - Invite Flippy to your server
If Flippy (our Discord bot) isn’t in your server yet, click here to invite it.| Bot Permissions | Required | Reason |
|---|---|---|
| View Channels Send Messages Embed Links Read Message History | ✅ | Flippy requires it to send messages in your server. |
| Use External Emoji | ✅ | Required to show custom emojis for tokens in messages. |
| Add Reactions | ❌ | Required if you want Flippy to react to messages. |
| Attach Files | ❌ | Required if you want Flippy to show images in messages. |
| Send Messages in Threads | ❌ | Flippy needs this permission to send messages in threads. |
| Create Public Threads Create Private Threads Manage Threads | ❌ | Flippy needs this permission to open threads for some requests to keep the main chat clean. |
| Manage Channels | ❌ | Required to automatically create an admin-only alerts channel when the bot is invited. Can be revoked afterwards. |
| Manage Roles | ❌ | Required to grant roles to users during verification, or when members receive roles as quest rewards or storefront purchases. |
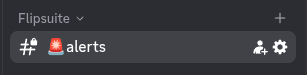
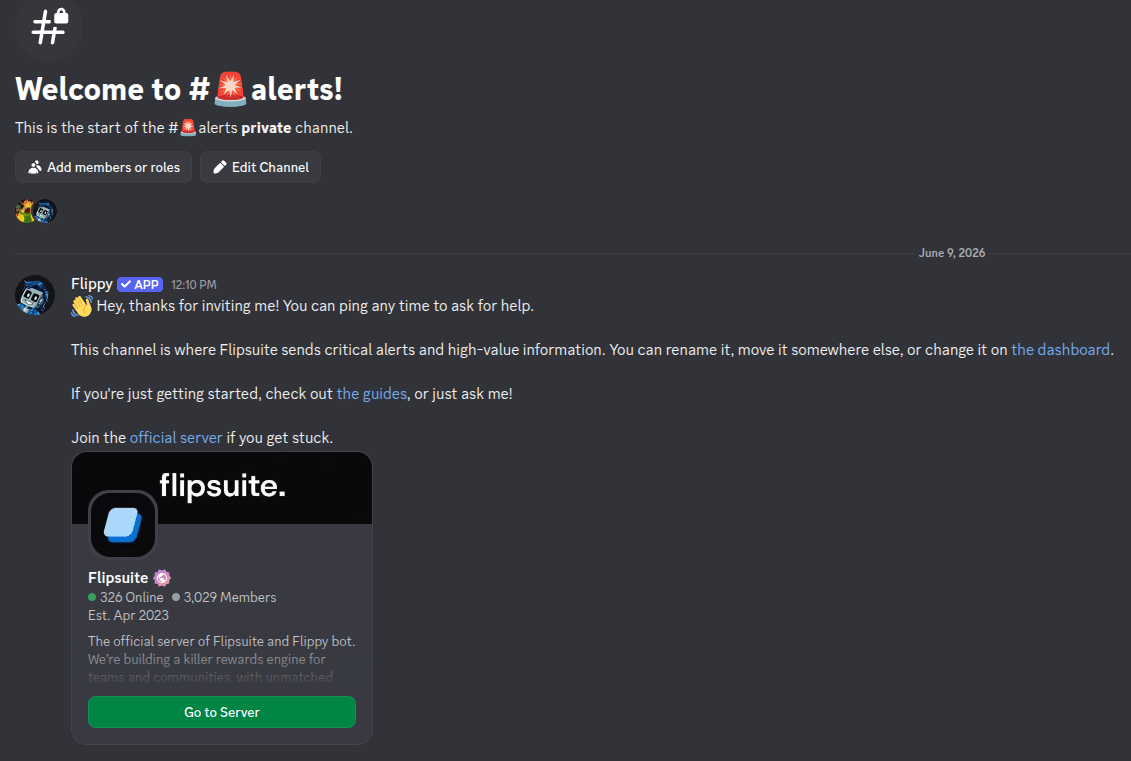
Step 2 - Setup alerts channel
If you enabled the Manage Channels permission when inviting Flippy to your server, a channel category named Flipsuite with the🚨alerts channel in it should get created:
Step 3 - Activate your server
Server activation is a one-click process of registering your server within Flipsuite. To activate your server, simply log into the dashboard and go to the Manage communities tab.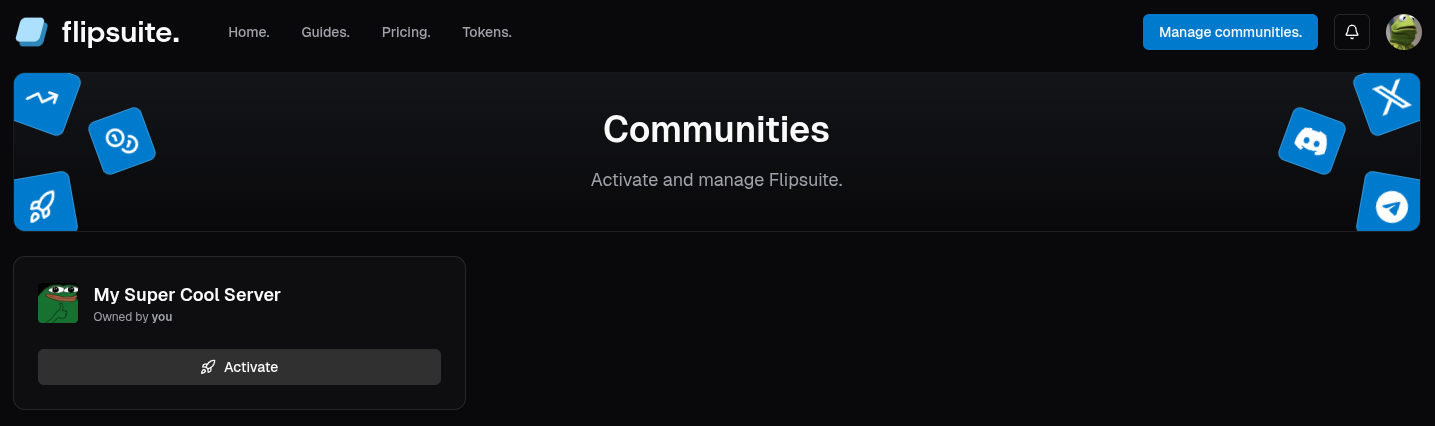
Each server can only be activated once. If someone else from your team has already activated your server,
ask them to create a team and invite you to it so you can manage it together.
Step 4 - What’s next?
Set up one of the Flipsuite modules below to add more utility and fun to your server, or create a team to manage your community together with your friends or co-workers.Essentials
Get familiar with Flipsuite and its essential features.Quest Engine
Learn how to engage your community with interactive quests and rewards.
Point Systems
Learn what points are and how they can power your community economy.
Flipwallets & Flippy
Get familiar with the Flipwallet and Flippy, a digital wallet assistant layered over Flipsuite.
Teams
Share your community with your team to manage it together and delegate responsibilities.
Modules
Deep dive into one of the Flipsuite modules below to add more utility and fun to your server.Gating
Learn how to use gating module in your server to automatically verify holders and members.
Storefronts
Create branded storefronts for roles, points, and custom rewards.
Swap
Learn how to swap and bridge tokens directly in Discord using your Flipwallet.
Tipping
Learn how to airdrop, raffle and tip tokens in your server.