Documentation Index
Fetch the complete documentation index at: https://docs.flipsuite.xyz/llms.txt
Use this file to discover all available pages before exploring further.
How do custom gating rules work?
Custom gating rules can connect to your own API and grant roles to users in your server based on the provided response.Adding custom gating rules
To add your first collab gating rule, go to the Gating tab in your community dashboard, switch to the Rules tab, click the Create new rule button, and choose Custom Gating Rule to start.@Tradoor
role to every person who generates at least 500 USD in volume on it.
You can create an API endpoint at /api/user-volume that takes the request received from Flipsuite and returns the
total volume (in USD) generated by the user supplied in the request, based on the wallets linked to their account.
Here are the rule settings you would likely set when creating a custom gating rule for this case:
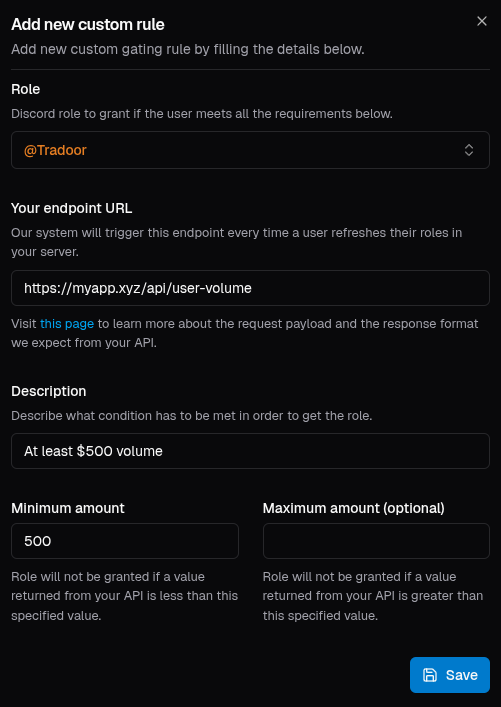
POST request which contains both role and user details
each time user roles are refreshed (automatically or due to user manually verifying their eligibility for the roles).
Your endpoint should return either a numeric value (for attributes like points, score or exp in your app) or a
boolean value denoting whether the role should be granted or not, if you prefer to check the conditions on your
own.
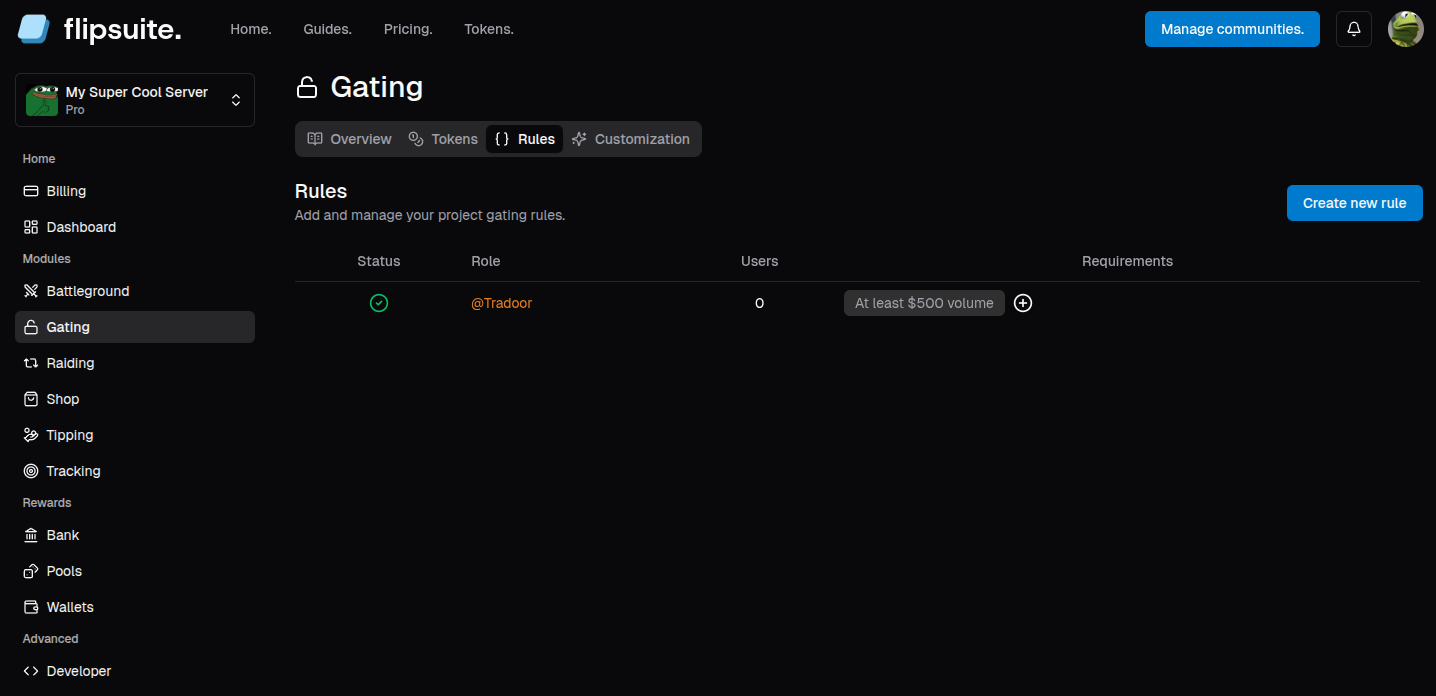
Result
After configuring and adding custom gating rules, the Rules tab should now be populated with the gating rules you’ve created.