Documentation Index
Fetch the complete documentation index at: https://docs.flipsuite.xyz/llms.txt
Use this file to discover all available pages before exploring further.
Setting up tokens
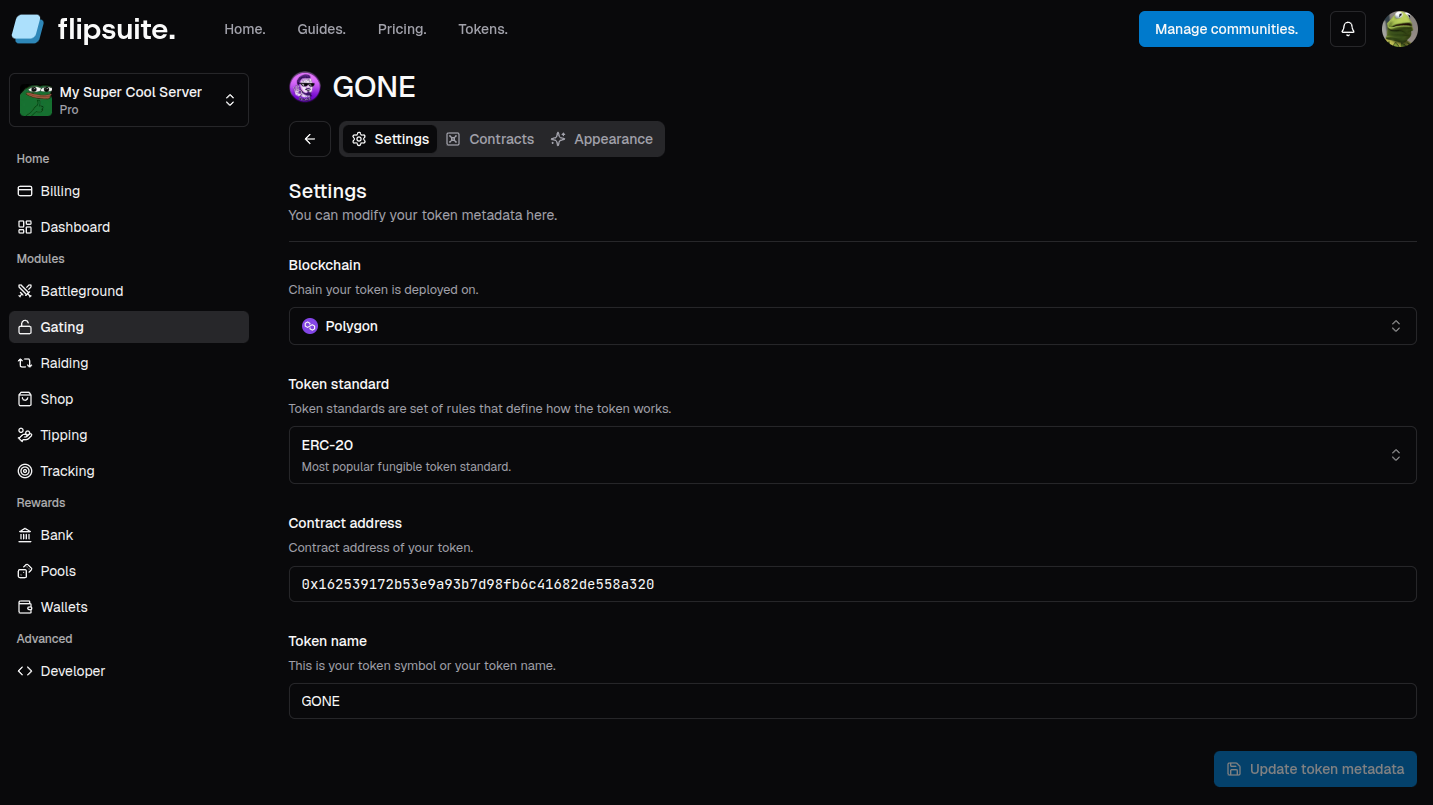
First thing you have to do when setting up token gating rules in your server is to enter your token or NFT collection details into Flipsuite. To do it, go to the Gating tab in your community dashboard and switch to the Tokens tab.- Token standard:
Whether it’s a coin, NFT collection or something else. - Contract address:
Contract address of your token, or a verified creator address in case of Solana NFTs. - Token ID:
ID of a specific token if your collection allows multiple copies of the same NFT. - Token name:
Symbol of your token or name of your NFT collection. It’s purely cosmetic.
Adding staking contracts (optional)
With Flipsuite, you can verify tokens and NFTs even if they are staked or locked in external contracts. To add your staking contract to Flipsuite, go to the Contracts tab.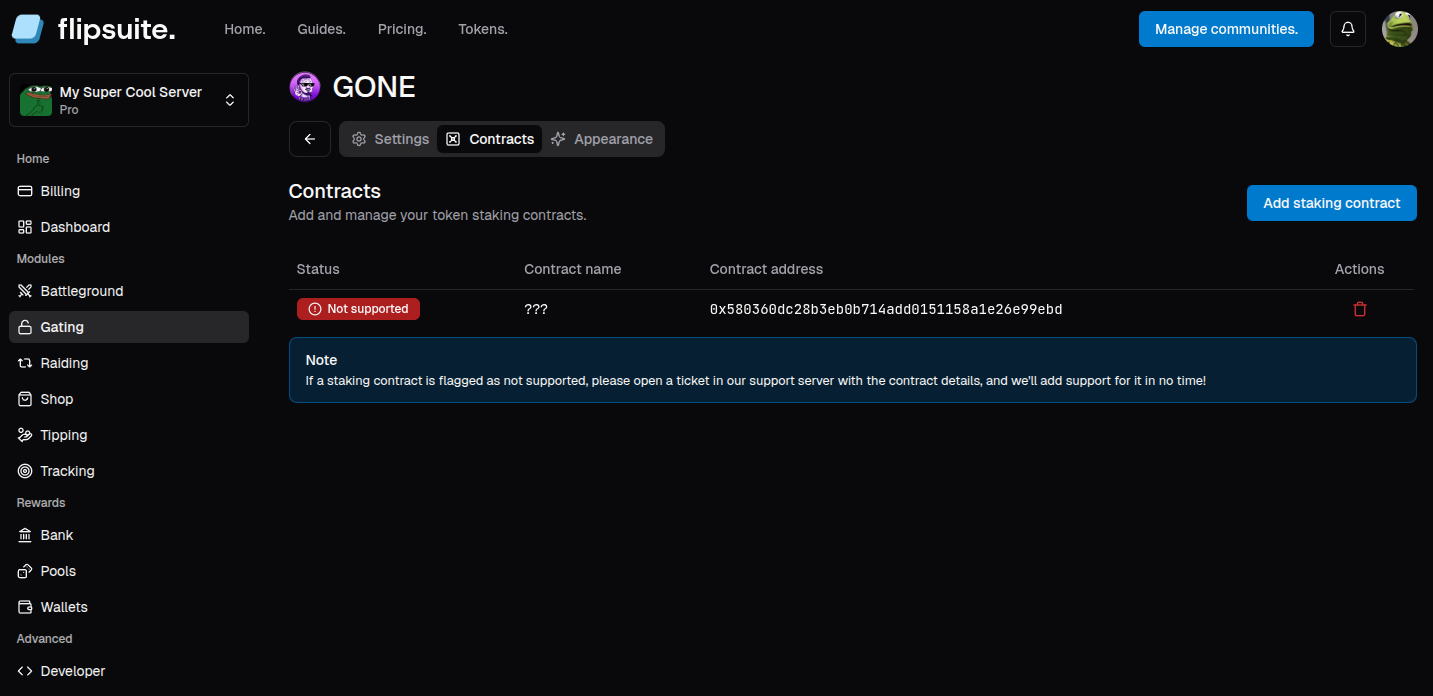
- Blockchain your token is on
- Staking contract address or link
- Contract ABI (if your contract isn’t verified on the blockchain explorer)

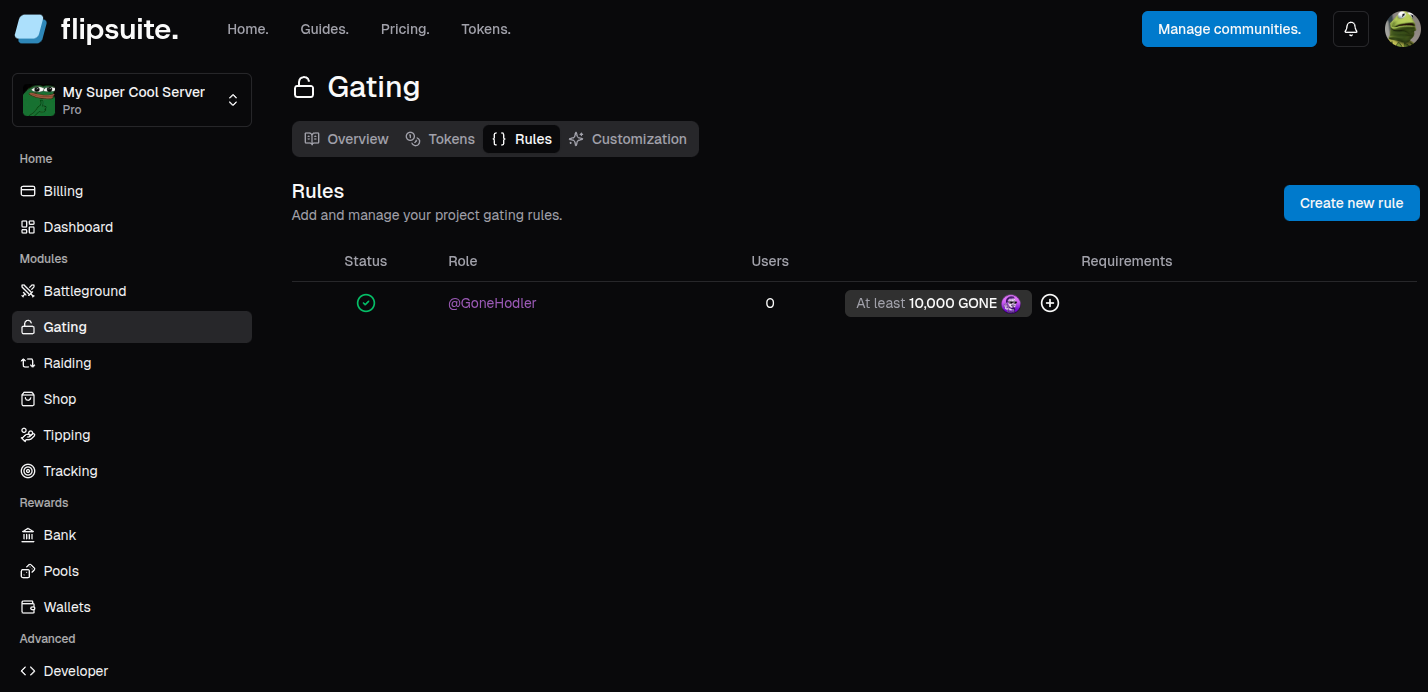
Adding token gating rules
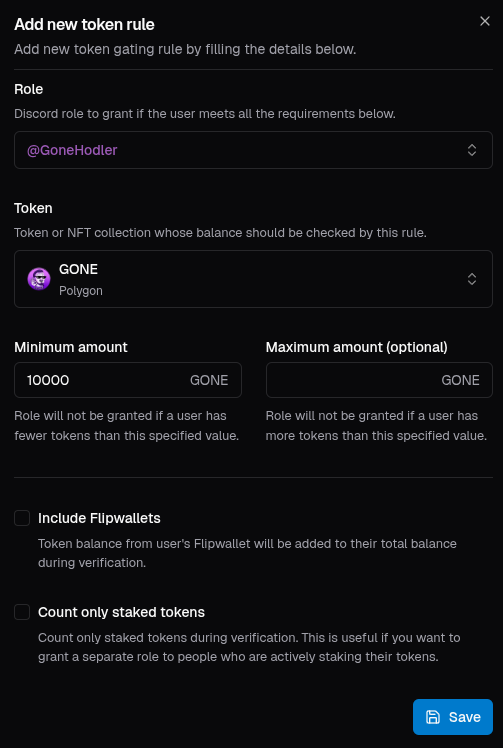
To add your first token gating rule, go to the Rules tab, click the Create new rule button, and choose Token Gating Rule to get started.Adding rule for a token
There a couple of settings you can set when creating a token gating rule for a token, including:- Role to grant:
Discord role to grant if the user meets the requirements. - Min and max amounts:
Amount of tokens that’s required to get the role. - Include Flipwallets?
Whether to include user’s Flipwallet balance during verification. - Count only staked tokens?
Whether to count only staked tokens during verification.
Adding rule for an NFT collection
When creating a token gating rule for an NFT collection, you get a few more settings to set:- Role to grant:
Discord role to grant if the user meets the requirements. - Min and max amounts:
Amount of NFTs that’s required to get the role. - Specific token IDs:
List of specific token IDs to check during verification. Perfect for granting unique roles for holding specific NFTs. - Required NFT attributes:
List of attributes an NFT must have in order to qualify. - Include Flipwallets?
Whether to include user’s Flipwallet balance during verification. - Count only staked tokens?
Whether to count only staked tokens during verification.
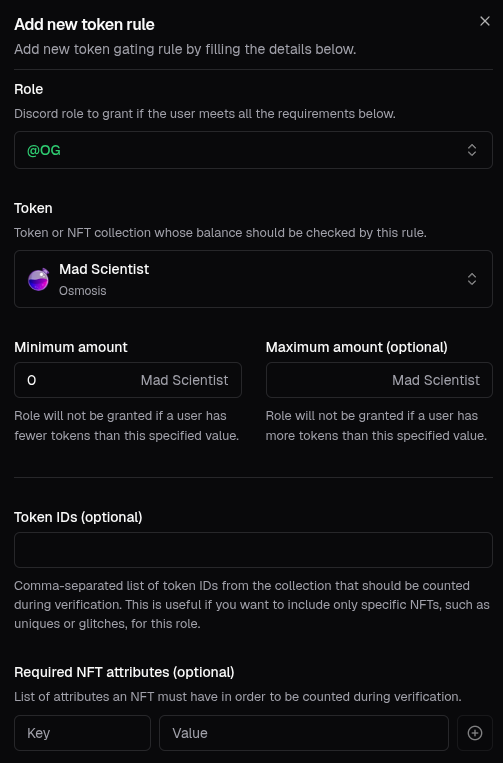
Attribute-based rules are available only on the Starter plan.
Recipes
Below are some of the most common ways to set token gating rules:Overlapping roles
The most common approach to structuring your roles is to make them overlap. For example, if you have 3 rules, each representing a different holder tier, you would configure them like this:@Tier1- Minimum of1,000tokens@Tier2- Minimum of10,000tokens@Tier3- Minimum of100,000tokens
100,000 tokens, gets all of the
roles. It makes the server management of roles a lot easier, because channels that are locked to the first tier will
be accessible by the higher roles as well.
Separated roles
This approach, on the other hand, makes it so every person in your server can only have one of the tiers assigned to them at once. All you have to do is extend the example above and set the maximum amount option as well:@Tier1- Minimum of1,000tokens, maximum of10,000tokens@Tier2- Minimum of10,000tokens, maximum of100,000tokens@Tier3- Minimum of100,000tokens
50,000 tokens only gets the @Tier2 role, a person who holds at least 100,000 only gets
the @Tier3 role and so on.
Maximum amount option is exclusive, which means that if you set it to
100,000, people who hold exactly
100,000 tokens won’t get the @Tier2 role.Only counting staked tokens
If your token or NFTs can be staked, it’s common to create separate roles for people who stake their tokens. This way you can detect who’s in your project for the long game, and reward them by giving these roles extra perks like access to alpha channels, reward multipliers, access to exclusive raffles and so on - it’s up to you.Attribute based rules (NFTs only)
If you have an NFT collection, it likely has different attributes/traits, some of them being more common, and some of them being ultra-rare. People love to feel special, and creating extra roles for holding an NFT with a specific attribute or set of attributes will make people in your community feel just like that.Result
After configuring and adding token gating rules, the Rules tab should now be populated with the gating rules you’ve created.