Documentation Index
Fetch the complete documentation index at: https://docs.flipsuite.xyz/llms.txt
Use this file to discover all available pages before exploring further.
Step 1 - Set up gating rules
First thing you have to do when setting up gating in your server is to set up rules in your community dashboard that will determine what requirements must be met by users to get roles.Important!
Flipsuite can only grant and revoke roles from users in your server that are below its role in your server’s
role hierarchy. You can access it by going to the 
Roles tab in your server settings.Gating Rules
There are 5 types of rules you can use to grant Discord roles to people in your server:Token Gating Rules
Grant roles to users based on their token and NFT holdings.
Points Gating Rules
Grant roles to users based on their point system balance.
Collab Gating Rules
Grant roles to users based on their roles in a different Discord server.
X (Twitter) Gating Rules
Grant roles to users based on their linked X accounts.
Custom Gating Rules
Grant roles to users based on your own API.
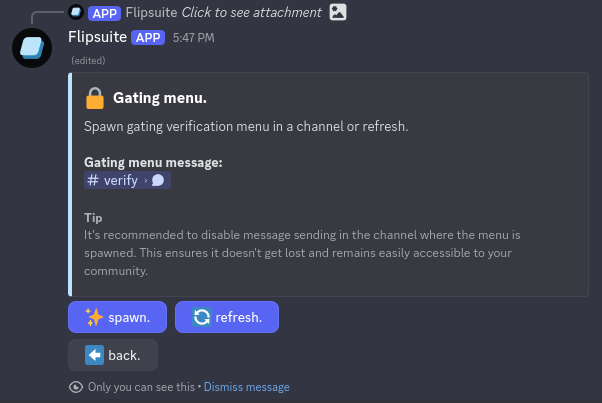
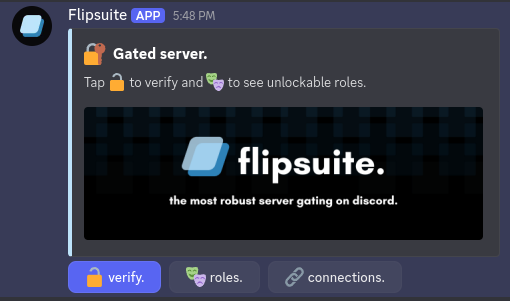
Step 2 - Spawn the verification embed
Spawning of the verification message is done via admin control panel in Discord. Simply go to⚙️ settings > 🔒 gating > 🔒 verification embed until you are here:
What’s next?
Learn how to set up notifications, refresh roles, and customize your verification embed.Refreshing
Learn how to manually refresh your community members’ roles.
Notifications
Get notified whenever users’ roles are updated due to verification.
Customization
Customize the gating verification message in your server.